Blog · Mason Bees · Predators · Bee Care ·
How to Get Rid of Predators in Your Mason Bee Hotel

Putting up a mason bee hotel is a wonderful way to support these incredible spring pollinators, but putting up a bee house is only the beginning.
Proper care and maintenance are essential to keeping your mason bee habitat healthy. Predators can build up inside nesting materials from year to year, and you may never know they’re there just by looking at the outside of your bee house.
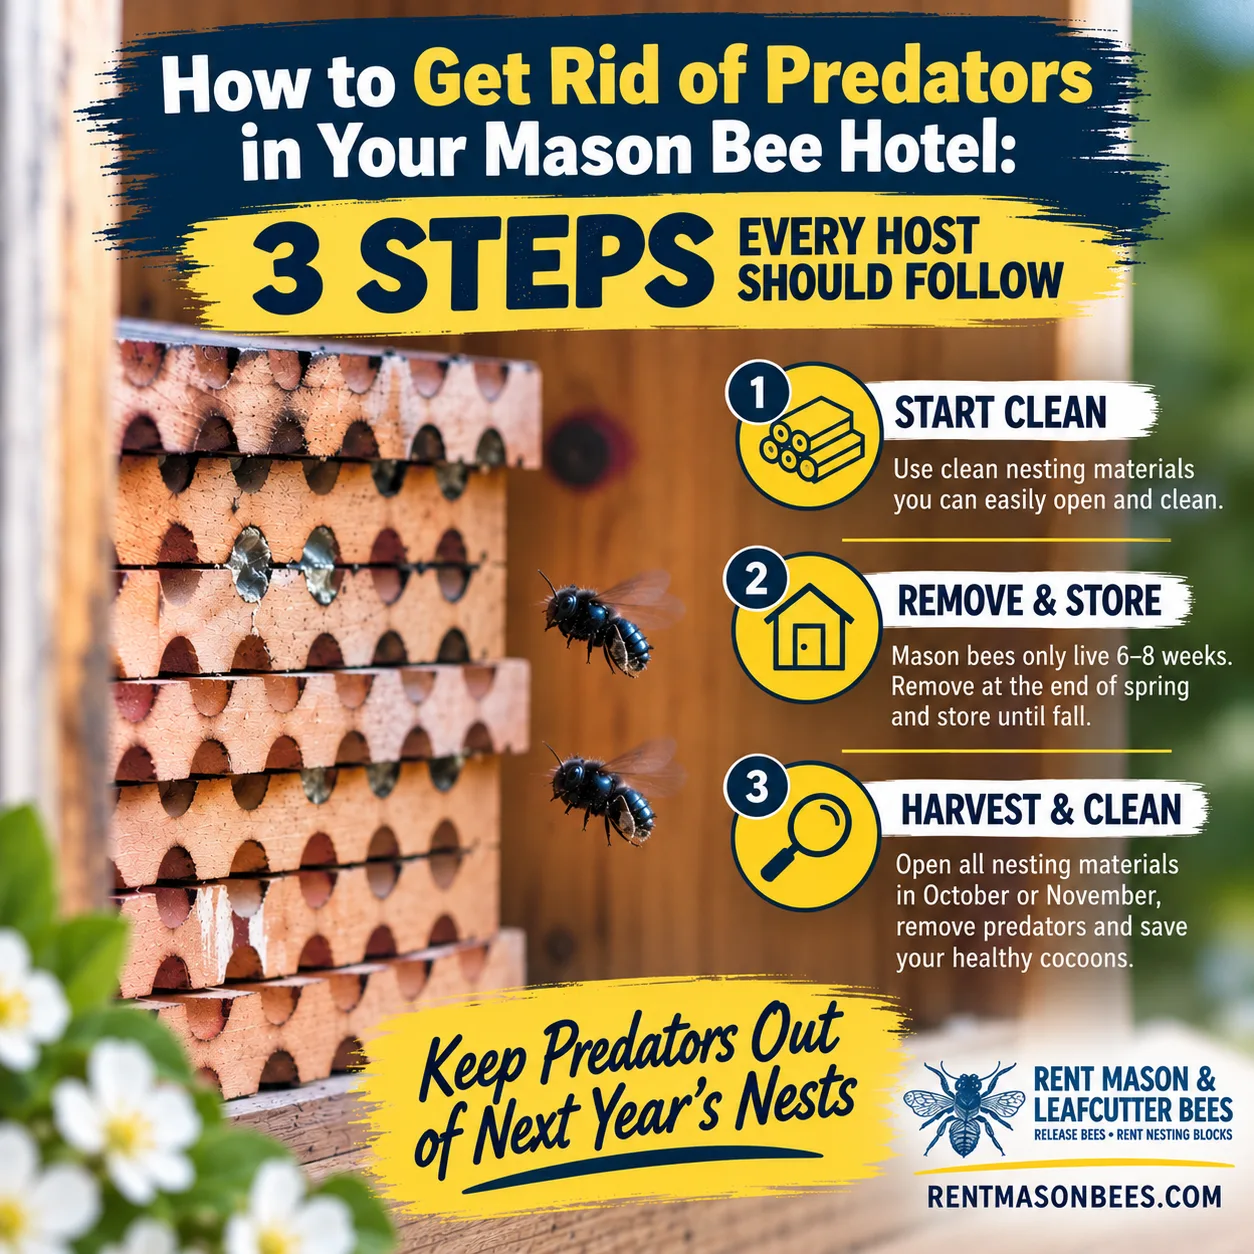
The good news is that caring for your mason bees doesn’t have to be complicated. Follow these three important steps every year to help remove predators, protect healthy cocoons and give the next generation of mason bees a clean place to nest.
Step 1: Start Every Spring With Clean Nesting Materials
Every spring, your mason bees should start with clean nesting materials.
We recommend using nesting materials that can easily be opened and cleaned, such as stacking wooden nesting trays or removable cardboard tubes.
Why is this so important?
Female mason bees build individual nesting chambers inside each hole. They collect pollen and nectar, lay an egg and seal each chamber with mud. Once those chambers are closed, you can’t see what’s happening inside.
Predators can be hiding behind those mud walls even when everything looks perfectly healthy from the outside.
Using nesting materials that can be opened allows you to inspect every nesting chamber during fall harvest, find predators and save your healthy mason bee cocoons.
If you can’t open your nesting materials, you can’t see what’s happening inside.
Step 2: Don’t Leave Your Mason Bee Nests Outside All Year
Mason bees are spring bees. Adult mason bees only live for about 6–8 weeks.
Once their spring nesting season is finished, their job is done. Your filled nesting materials do not need to stay outside all year.
At the end of spring, remove the filled nesting materials from your bee house and store them in a protected location until fall.
Inside those nesting chambers, the next generation of mason bees will continue developing throughout the summer. Eventually, each developing bee spins a protective silk cocoon.
Removing and properly storing your nesting materials after the spring season helps protect those developing bees until it’s time for fall harvest. Watch this video to teach you how to store over summer
Step 3: Open, Harvest & Clean Everything in October or November
By October or November, your mason bees have developed and spun their protective silk cocoons. Those cocoons are now durable enough to be removed from the nesting materials and cleaned.
This is when you finally get to see what’s really happening inside your mason bee hotel.
Open all of your nesting materials and inspect every nesting chamber.
You’ll find healthy mason bee cocoons, but you may also discover pollen mites, chalkbrood, Houdini fly larvae and other predators that were completely hidden behind the mud walls.
Now you can separate the healthy cocoons from the predators and compromised nesting material.
This is one of the most important reasons we harvest mason bee nests every fall.
What Should You Do With the Predators You Find?
When you find predators inside your nesting materials, don’t simply throw them into your outdoor garbage or compost pile.
Some can survive and continue their life cycle.
Predators and affected nesting debris should be properly destroyed. Burning or freezing them can prevent living predators from surviving, emerging and finding mason bee nests the following spring.
You’ve already done the work to find and remove them. Make sure they don’t have an opportunity to come back.
Found Pollen Mites or Chalkbrood? Clean Your Wooden Blocks Too
If you discover pollen mites or chalkbrood, removing what you can see inside the nesting chambers isn’t enough.
Pollen mites can be extremely small, and chalkbrood spores can remain behind on the surfaces of your wooden nesting materials.
After opening and cleaning your stacking trays or wooden nesting blocks, flame or fire the nesting surfaces to help eliminate remaining pollen mites and chalkbrood spores before using the blocks again.
Do not wash or soak your wooden nesting blocks in water. Getting wood blocks wet can cause the wood to swell, warp and become damaged.
Your goal is to start the following spring with clean bees and clean nesting materials.
Three Steps to a Healthier Mason Bee Hotel
It really can be this simple:
- SPRING: START CLEAN — Put out clean nesting materials that can easily be opened and cleaned.
- END OF SPRING: REMOVE & STORE — Mason bees only live 6–8 weeks. Once their nesting season is finished, remove the filled nesting materials and store them safely until fall.
- OCTOBER/NOVEMBER: OPEN & CLEAN — Open every nesting chamber, harvest your cocoons, remove predators, clean your healthy cocoons and prepare your nesting materials for next spring.
Then you start the cycle again with clean nesting materials and healthy mason bees.
Watch: How to Harvest & Clean Your Own Mason Bees
If you’ve never opened and cleaned your mason bee nesting materials before, we’ll show you how.
Our step-by-step video walks you through the entire process so you can learn how to open your nesting materials, harvest your cocoons, identify problems and clean your mason bees.
Watch: How to Harvest & Clean Your Own Mason Bees
Watch how we harvest and clean over 3 Million Cocoons every October.
Healthy Bees Start With Clean Nesting Materials
You don’t need to be an expert to properly care for your mason bees. You just need to understand their annual life cycle and know when it’s time to step in and help.
Start clean. Remove and store. Harvest and clean.
Following these three steps every year allows you to see what’s happening inside your bee hotel, remove predators before they can affect future generations and give your healthy mason bees a clean place to start again next spring.
Thank you for taking the time to properly care for your mason bees and for being a great bee host!
Learn more about mason bee predators
Visit our Store for Bees, Kits and Supplies